Skip to main content Skip to main content

Project Playbook: Educator Edition

Balloon Race 8th Grade Forces & Motion – Overview

Lesson plans and standards for Forces and Motion activities.

Lesson 1: Zipline Activity(basic intro to motion)

Objective: Students will construct a zip-line to recognize and analyze the motion (and cause of motion) of an object. Students will begin to be able to evaluate the causes of motion and deduce the important factors in measuring motion (time and distance)

Learning Goal: Motion is achieved when a unbalanced forces are applied. The amount of mass and force affect motion of an object. Distances and time are necessary to calculate speed.

Vocabulary: motion, force, gravity, acceleration, balanced forces, unbalanced forces, speed, distance, time, reference point

Engage:

  1. Teacher leads a class discussion and asks students “How many of you have ever been traveling somewhere and have been stuck in traffic for a long time? What do you think are some of the causes of the traffic?”
  2. Students write down their responses and share with groups.
    • Possible student answers: too many people traveling, inefficient road ways, car accidents, broken down cars,
  3. Teacher records their ideas on the board.
  4. Teacher leads a conversation as to how public transportation can help to alleviate some of these major issues.

Explore:

Students are given the prompt that they all are working for a large transportation engineering firm that has been contracted by the city of Los Angeles to create a public transit system to travel directly from our location and to the beach.

  1. After receiving the prompt students are given the expectations of the assignment:
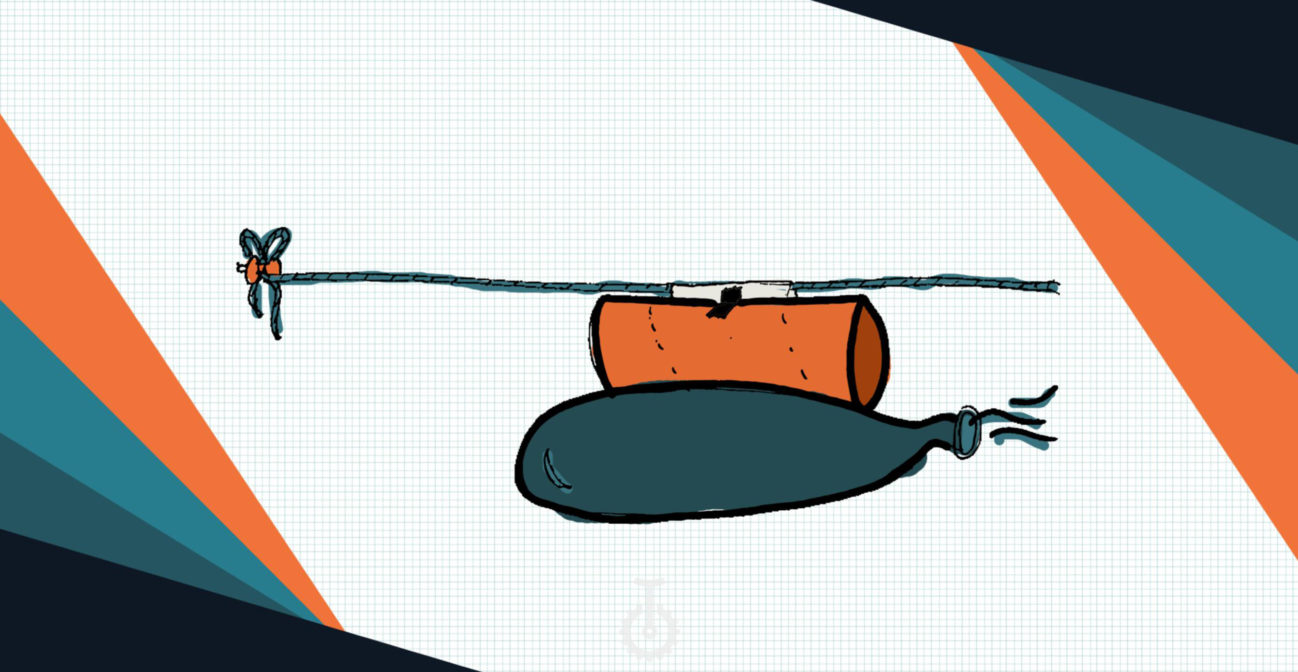
    • Working in teams students will design a vehicle that is able to travel across the length of the room (or from chair to chair) using only the materials given: scissors, tape, fishing line, balloon straw, and masses.
    • The objective is for the vehicle to reach the other end of the room (or chair to chair) in the fastest time possible using only the materials given to them.
    • Students may being to investigate the impact adding mass will have on their speeds.
  2. Students work in teams to design their vehicle and test the various strategies they have created.
  3. Once students have made adequate progress, bring the whole class together to discuss the norms of building their vehicle. “How do you know that the object moved? What are some of the ways your teams are using the balloon? Did we notice any issues with how to place the balloon on the straw? Etc”
    • Having students share out the norms of building the vehicle will give an opportunity for students to learn from one another’s design process, providing insight to what works and does not work.
  4. Students make the final revisions on their balloon vehicles and record time and distance data for three trials.

Explain:

  1. Teacher leads class discussion as to the cause of motion “What caused the vehicle to move? How can you describe the movement of your vehicle? What caused your vehicle to move faster or slower?”
  2. Teacher explains that all movement requires an energy, or force, to start and end movement.
    • Teacher note: This lesson may be adjusted to various levels in the unit, it may be used to introduce motion, graphing, measuring motion, or unbalanced forces.
  3. Introduce students to the idea of balanced and unbalanced forces.
  4. “As scientists and engineers we need to be able to quantify and communicate how much force is being applied to objects, how do you think we can communicate how much force is being applied.”
  5. Introduce students to free body diagrams/ force diagrams.


Elaborate:

  1. Students draw a free body diagram for their zip-line, both at rest and moving.
  2. Students also will graph their data from the three trials. (Optional depending on pacing of class and order of progression)

Evaluate:

  1. Students free body diagrams and speed calculations serve as their evaluations.
  2. Students will also have a follow up worksheet to diagram several objects in motion and at rest.

Additional Resources:


Lesson 2: Car Design (add forces and the cause of motion)

Objective: Students will design and construct a self-propelled car to examine how forces are used to move objects.

Learning Goal: Students will investigate alternative ways to propel cars. What is the source of motion and the basic engineering cycle.

Vocabulary: friction, chassis, force

Introduce students to automotive engineering: “Automotive engineering is a billion dollar industry that directly impacts the lives of almost everyone living in Los Angeles. For the next several weeks we will be following the engineering design cycle to build cars and test them.

Engage:

“The city of Los Angeles has decided that the zip-line design may be too expensive to implement city wide and has hired our engineering firm to design and build several transit cars in place of the zip-line. The first step in designing and building a car is designing”

  1. Show students pictures of concept cars and buses.
    • Examples of concept public transit: (add more realistic concepts, taxi/ bus)
  2. Have students ,individually, design a concept bus
    • Students may focus on several different types of designs to maximize for speed, passenger load, or safety

Explore:

  1. Introduce the Engineering Cycle
  2. “The concept car is just the beginning of the planning and designing phase of automotive engineering, in order to truly start planning the design of your car you must know what materials you are going to be using for your car.”
  3. Show students the materials that they will be using to build their “stock car”
    • Students will first begin building their cars using all the same materials, the stock car. They will have an opportunity to “buy” and bring in materials from home to customize and change their vehicle after it has met the travel criteria.
    • Students will be given different size car bodies/chassis in order to compare data in later investigations.
  4. In pairs, students being to design and build their car which must be able to travel 3 meters on a flat surface.

Explain:

  1. Once students have begun to make adequate progress towards building their vehicles, students will share out the norms of building, “What are you noticing about the balloon placement on the chassis? How are you connecting the wheels? Etc”
  2. Teacher leads a classroom discussion as to how the vehicle is being propelled, and the source of the force. “How can we communicate this idea to other people, how can we quantify or illustrate force?”
  3. Transitions into free body diagrams.
  4. Teacher leads a conversation as to how we can measure the speed or rate.

Elaborate:

  1. Using Newton’s Third Law students will create a free body diagram showing the force being generated by the balloon and how it is propelling the vehicle forward and where friction may occur.
  2. Students will also use this time to make changes to their car following the share out of the norms of building.
    • All of the changes that are being made to the cars should be kept track of in the car changes log along with an explanation.

Evaluate:

  1. Students will be evaluated by the demonstration of Newton’s Third Law with free body diagrams and completing several other examples provided in a follow up worksheet. Followed with practice speed calculations.

Lesson 3: Investigation: Speed

Objective: Students will create and edit/revise their cars to calculate the speed of their cars and compare/contrast the speeds of different cars in order to evaluate best practices for speed. Students will be able to produce a D vs. T graph from their data.

Learning Goal: Motion energy is kinetic energy. Measuring motion: Speed= distance/time. Average speed= total D/total T, Graphing speed Vocabulary:

Engage:

  1. Students will brainstorm about some of the important aspects of the car that we should test, “What are 3 standard performance criteria you would want to know about a car before investing money in one? Come up with an investigation to measure one of your standards.”
    • Possible student answers: How fast the car will travel, how safe the car is, how many people can fit inside, how much the car cost,
  2. Students will come up with the various criterions that they may want to measure; Teacher records the ideas on the board.
  3. Teacher leads a discussion as to how you can test some of the criterion.

Explore:

  1. Students will establish a baseline, or control, for how fast their car is able to travel with at least 3 trials on a flat surface.
  2. Data will be recorded and graphed.
  3. Students will share out the information they had learned about their cars’ performances and how they improved them.
  4. Once the information has been shared amongst groups students will have a chance to modify their cars to try and help increase the average speed.
    • During this time students will have an opportunity to use their budget to purchase extra materials to change wheels, chassis types, axels etc.
    • All changes will be kept in the car change log and will also account for budget changes.
  5. Students will finalize their changes and record the final three trials for their car.

Explain:

  1. Once students have compiled their data the teacher will explain/review how to graph the data points correctly.
    • Depending on how the unit is taught, graphing motion may be a review for students.
  2. Teacher explains how the slope defines the average speed of the vehicle and how they can be used to compare data.
  3. Teacher also introduces motion energy as kinetic energy.

Elaborate:

  1. Using the data students have gathered, students will explain how their changes to the car have improved or hindered the speed of their vehicles.
  2. The students graph their data points.
  3. Students share data between groups and graph to see how the different slopes relate to the different speeds of each other’s cars

Evaluate:

  1. Using the graphs and data students will be evaluated on how they cite and support their claims as to why the changes made to the car worked or did not work.

Lesson 4: Investigation: Varying Mass

Objective: Students will be able to analyze/evaluate the effect of changing the mass of the car on the car’s speed and acceleration

Learning Goal: Newton’s 2nd Law of Motion: Changing the mass of car affects the speed and acceleration. The greater the mass of the object the greater the force needed to achieve the same motion.

Engage:

  1. Working in pairs students review their speed data, design, and graphs.
  2. “What are some of the factors that possibly contributed to your car not traveling as fast as possible, what caused your car to eventually come to a stop?” Students list possible problems and solutions with their car design.
  3. Students share out some of their findings and how they can solve them.

Explore:

  1. Students are given the task to transport 3 different masses across a 3 meter track.
  2. Students record data for 3 trials for each of the 3 different masses (total 9 trials)

Explain:

  1. Teacher explains F=MA and the relationship between force, mass, and acceleration.
  2. As we add mass to our cars what affect will it have on acceleration if we keep the force constant? What if we increase the force?
  3. Students hypothesize about the possible outcomes of these questions.

Elaborate:

  1. Students graph their results to see if their slopes match the predicted outcome.
  2. Students share data to analyze if a trend/pattern is evident across groups when adding/subtracting masses.

Evaluate:

  1. Students summarize how adding more mass impacted the speed of their vehicle citing data from their graphs, calculating the average speed for each of the mass changes and identifying if there was a positive or negative correlation.
  2. Students will have a follow up handout given asking them to solve F=MA problems.

Lesson 5: Investigation: Varying Force

Objective: Students will be able to analyze/evaluate the effect of changing the amount of force (exerted on the car) on the car’s speed and acceleration.

Learning Goal: Newton’s 2nd Law of Motion: Changing the force on the car affects the speed and acceleration. The greater the mass of the object the greater the force needed to achieve the same motion.

Engage:

  1. Teacher leads a review of the equation F=MA
  2. Students are asked, “ Looking at the equation F=MA, what are the two variables that impact the acceleration of the car, A?”
  3. In pairs students record the ways you can change these two variables, specifically how they can change them with their vehicles.
  4. Students are shown a clip from the Fast and the Furious: (Any clip of a car accelerating will suffice ) http://www.youtube.com/watch?v=pZZ60jrw6cg
  5. How did the actors increase the acceleration in their cars?
  6. How can we increase the acceleration of our vehicles?

Explore:

  1. Students are given an extra balloon and are given the challenge to increase the average speed of their vehicles
  2. The teacher reminds the students that the correlation of mass and the impact on speed.
  3. Students vary forces at least 3 different ways (half-filled balloon, two balloons at once, one balloon at a time etc.)


Explain:

  1. Teacher explains how an increase in force leads to an increase in acceleration when mass is held constant, or when mass is increase and the force is held constant acceleration decreases (as shown in the previous investigation).
  2. Students are introduced to proportionality (Optional)

Elaborate:

1. Students compare their results to see if the pattern is consistent, as force increases is there an increase in acceleration.

Evaluate:

  1. Students determine if there is a relationship between the addition of forces and an increase in acceleration, students are evaluated based on their ability to cite their data and graphs
  2. If there is a relationship students identify whether it is directly or inversely proportional.
  3. If there is no apparent relationship students are able to identify possible error in data collection or in the procedure.

Additional Resources:

  1. PhET online simulation of forces and motion http://phet.colorado.edu/en/simulation/forces-and-motion


Lesson 6: Investigation: Downhill

Objective: Students will be able to show how potential energy changes with the height of an incline and illustrate how the potential energy changes into other forms of energy.

Learning Goal: Objects may also contain potential energy depending on relative positions. Potential energy increases as height of ramp increases. When two objects interact energy can be transferred from one object to another.

Vocabulary: potential energy, incline/decline plane, transfer, kinetic energy, gravity

Engage:

  1. Teacher asks whole class if to remember the last time they were on a road trip or traveling somewhere very far.
  2. Students are asked to recall “What were they freeways and roads like? Were they busy? Were they flat and smooth?”
  3. If we are designing a car to transport people a long distance, how can the road conditions impact the efficiency of travel?”
    • Possible student responses: The roughness of the road may add friction, the incline/decline may impact speed, the amount of traffic.
  4. Students list possible road conditions and how they may impact the efficiency of our vehicles.
  5. Teacher records the students suggestions on the white board and how it may impact the vehicle.

Explore:

  1. Students will have 3 ramps that are set to various declines
  2. Students will set their vehicles at the top of the ramp and measure the speed for three trials for each of the three ramps.
  3. Students record and graph the data

Explain:

  1. Students are asked to share out their data and compare amongst the different inclines.
  2. “Were there any patterns that you noticed?”
  3. The teacher explains the concept of potential energy changing to kinetic energy.
  4. The transition from potential energy to kinetic energy can be diagramed, which will be shown to the students.
    • Example of kinetic v. potential energy diagram

Elaborate:

  1. Students diagram the potential energy of each ramp at various positions.
    • Example of possible potential
    • Students point out at what points potential energy is the greatest and the least and explain why.
  1. Students also describe how this may potentially impact the fuel economy of their proposed vehicle, “Can the potential energy be used to reduce the amount of fuel consumption? How so?”

Evaluate:

  1. Students will be evaluated on the graphs they have created for potential energy, as well as the data and patterns they noticed from the increase of decline in ramps.
  2. Students must support their claims by citing data that they have collected.

Lesson 7: Uphill Climb

Objective: Students will be able to analyze all the forces acting on a car traveling up an incline and will design/construct a car that is able to move up and over an incline

Learning Goal: When two object interact energy can be transferred from one object to another. Amount of force needed to propel car must be greater than forces acting in opposite direction.

Engage:

  1. Teacher will first show students pictures of some of the steepest hills in LA which can be found through Google images.
  2. Teachers prompt students, “With these images in mind write down the impact these hills may have on public transportation?”
  3. Students will share some of the ramifications of these hills may be, citing the previous downhill investigations.

Explore:

  1. Following a similar setup to the downhill investigation, students will investigate the impact 3 different inclines will have on the acceleration of the vehicles.
  2. Students record the data for each of the trials for each incline (total 9)
    • Teacher Note: Getting all of the cars to be able to travel up an incline may take a class period to edit/revise vehicles to ensure the cars are generating enough force.

Explain:

  1. The teacher begins the explanation with the question “ How did this investigation differ from the downhill investigation?”
  2. The teacher explains that the amount of force needed to propel must be greater than the forces acting in the opposite direction. So if there is more force in the opposing direction there must be more force applied in order for the vehicle to go uphill (Unbalanced Forces).Students are introduced to the idea of kinetic energy and how it is transformed into potential energy as the vehicle travels uphill and vice versa as it travels downhill.  As the amount of potential energy decrease the amount of potential energy increase proportionally.

Elaborate:

  1. Students diagram the change of kinetic energy to potential energy as the car begins to ascend the hill.
    • Possible student diagram:
  2. Students consider the implications this has on fuel economy, as the vehicle must exert more force in order to make it up the hill.

Evaluate:

  1. Students are evaluated on the diagrams and follow up questions on the transition of kinetic to potential energy and vice versa.
  2. Students address the question “ how can we use the built up potential energy to add to the fuel efficiency of the vehicle?” Students must cite data/ diagrams that they have created to support their answers.

Additional Resources:

PhET Simulation of Kinetic/Potential energy http://phet.colorado.edu/en/simulation/energy-skate-park

PhET Simulation of forces on an incline http://phet.colorado.edu/en/simulation/the-ramp http://phet.colorado.edu/en/simulation/ramp-forces-and-motion

Lesson 8: Car Collisions

Objective: Students will be able plan an investigation to predict how several forces will impact the motion of an object and design a solution to increase the safety of their vehicle.

Learning Goal: The motion of objects is determined by the sum of forces acting on the object. Mass and Force affect motion of two interacting objects. When two objects interact each one exerts a force on the other.

Vocabulary: net force, vector

Engage:

  1. Show students a video clip of the IIHS crash safety tests. 
  2. Teacher leads a class discussion ask students “what are the engineers testing in these crash tests? How do you think we can predict the direction of the collisions? How does mass impact car collisions?”
  3. Students brainstorm ideas and share in groups

Explore:

  1. Students are shown the PhET simulation for collisions and are asked to change the masses colliding.
  2. Students record any patterns that they notice as they increase the mass or the forces that are applied to each object.
  3. Students share out the patterns that they notice in small groups.
  4. Students are asked to diagram several car collisions with two and three objects colliding. Students diagrams should be in the form of a free body diagram looking from the “top view” of the masses so that forces are only being considered in one plane. 5. Once students have designed there collisions they are asked to predict the direction of the masses after the collision has occurred. 6. To illustrate their predictions students will use free body diagrams to show the forces that are acting on the masses.

Explain:

  1. Teacher explains how vectors/ forces can be added using vector addition using the nose to tail method.
    • This method is used to show how forces can be added together and illustrates the magnitude.
  2. Using students’ experiences from the simulation, students are asked to plan how they could plan an investigation to test how their car will perform during three collisions of increasing masses, 50g, 100g, and 150g.
    • Students are shown a stock car which mass can be added as well as a ramp to launch the stock car at a consistent speed. This will keep the speed constant, and therefore the force constant ( will only vary as the mass varies).

Elaborate:

  1. Students plan an investigation to show how cars will perform when collided with various mass cars.
    • Students investigation should include some way of measuring the cars performance, example: how far car travels after collision, or speed of car after collision
  2. Once students design their investigation they will predict how their cars will perform and will give a safety rating.
    • Good, Acceptable, Marginal ,and Poor

Evaluate:

  1. Students will be evaluated as to how they plan their investigation, rate their cars, and support their ratings.
  2. Students are also evaluated by how well they can predict several collisions using free body diagrams in the follow up assignment.

Additional Resources:

PhET online simulation of collisions with masses http://phet.colorado.edu/en/simulation/collision-lab

Lesson 9: Car Course

Objective: Students will design/construct a car that is able to complete the designed track(or course)that includes one large hill and a subsequent smaller hill to evaluate the effectiveness of their car (including speed, forces acting on car, etc.)

Learning Goal: Relationship between force, energy, and motion. Vocabulary:

Engage:

  1. “The final task in proving that your vehicle is worthy of mass transit requires you to proves that it is capable of traveling in realistic conditions. That means it must be able to travel over two hills, and will require you to use all of the skills you have been working on.”

Explore:

  1. Teacher will remind students that this is the final test for their car design, the car must be able to travel up two hills utilizing the transfer of kinetic energy into potential energy.
  2. Students will run several trails on the test track, trying to make improvements to get the best track time.

Explain:

  1. The teacher leads the students to share out any norms they’ve discovered as they test their cars on the track.
  2. Teacher explains the relationship between force, energy, and motion.

Elaborate:

  1. Students diagram the track diagraming the energy of the cars are lost and gained.
  2. Students make final changes to their vehicles and record the data for 3 trials and graphing their results.
  3. Students share out their data and compare/discuss their results.

Evaluate:

  1. As the culminating task, students will be asked to present their cars to the “transportation board of Los Angeles” in which they students explain why their design should be chosen for use as public transit.
  2. Students should support/cite all claims with data that they have gathered from all prior investigations.  Summary of cars overall performance
    • Explanation as to why their car performed the way it did
    • Explanation is supported by their data
    • What materials were used to build their car
    • Possible problems/ challenges and solutions
    • Considerations and implications for the future
    • Reflection on the design process

Credits

Powered by Two Bit Circus Foundation, 2020

Projects