Skip to main content Skip to main content

Project Playbook: Educator Edition

Magnetic Train

Interact with magnets to explore the properties of magnetism and magnetic fields.

MIDDLE SCHOOL – LEVEL 3

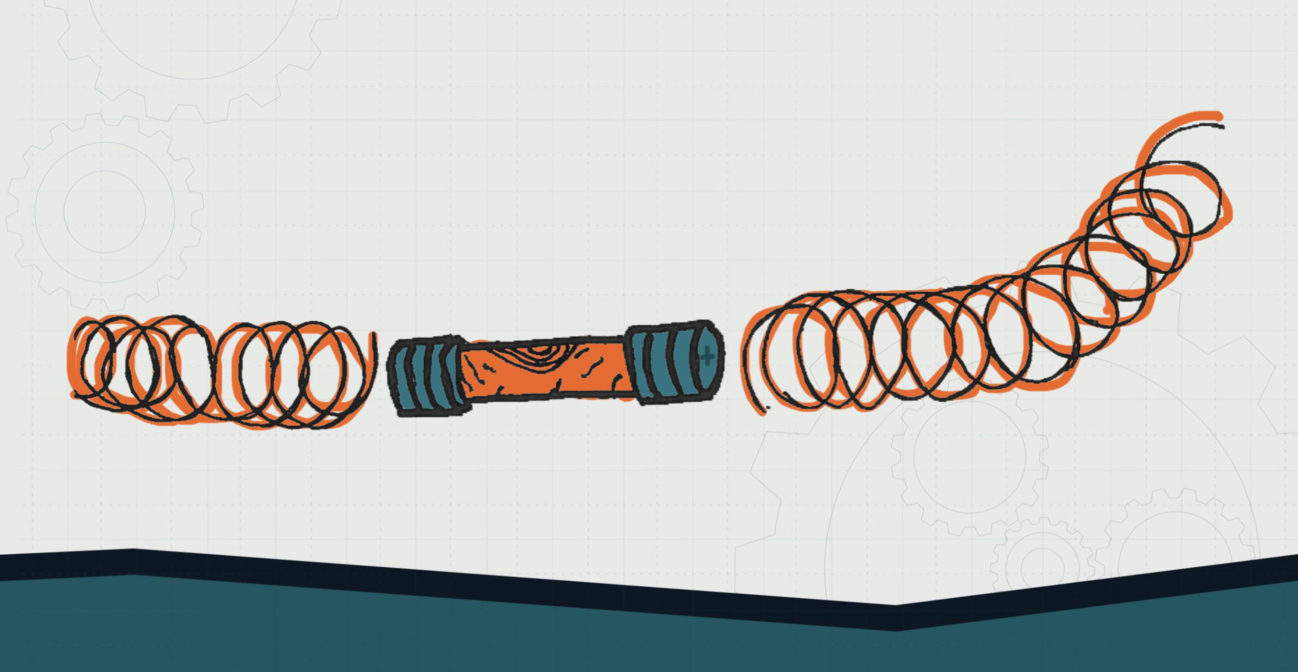
“Maglev” trains, short for “magnetic levitation,” are a type of train being used in some places that replace traditional steel rails and wheels with magnetic propulsion. These trains use two sets of magnets, one to repel the train off the track making it levitate, and the other to propel it forward. Let’s build a miniature magnetic train to learn how science makes this incredible feat possible.

FUN FACTS

  1. Magnets can be found in many common household items such as telephones, computers, stereos, refrigerators, and TVs.
  2. Earth, Saturn, Jupiter, Neptune and Uranus are the only planets in our solar system with magnetic fields.
  3. Legend has it that a shepherd from Greece named Magnes was the first to discover magnetic rocks when the iron tip of his staff was pulled towards a stone as he passed over it. These rocks were named magnetites, after Magnesia (in modern-day Turkey), Magnes’s home.

MATERIALS NEEDED:
❏ 20 gauge copper wire
❏ 6 neodymium magnets, 12mm
❏ ½” wooden dowel
❏ Tape

DIRECTIONS:

  1. Tape an end of the copper wire to the dowel and begin wrapping it in a coil. Wrap your coil tightly around the dowel, don’t let it overlap. You want to build a coil about six inches long. 2
  2. Take the coil off of the dowel and lightly stretch it out. You want the coils to be just far enough apart that they are not touching each other, but still closely wound.
  3. Make 2 stacks of magnets, 3 magnets in each stack.
  4. With the magnet stacks positioned so their charges repel each other, place the battery between the stacks.
  5. Put your train into the coil, it should propel itself forward and out the other end. You can also wrap the coil into a loop to keep

OBJECTIVE: Students will be able to ask questions about the magnetic phenomena and what strengthens and weakens magnetic effects.

ESSENTIAL QUESTION(S):

  • What is magnetism and how does it work?
  • How are electricity and magnetism related?
  • How might we use this electromagnetic phenomena to our advantage?

Engage

  1. Provide students an opportunity to play and experience with magnetism
  2. Set up various magnetism stations around the classroom
    • Two bar magnets
    • Bar magnet and a compass
    • Bar magnet, paper and iron filings
    • Bar magnet and aluminum can
    • Bar magnet and a series of magnetic and non-magnetic objects
  3. Ask students to circulate to the various stations
    • Draw pictures and record observations at each station
    • Generate questions about each exercise
    • Teacher asks facilitating questions as they circulate the classroom
      1. What happens to the compass when the magnet is close by? Does the distance you are away affect the compass movement?
      2. Can you generate any patterns in the iron filings?

Explore

  1. Set up additional stations (or do them together with the Engage portion)
    • Nail, copper wire, AA battery, paperclips b. Bar magnet, coil, LED or multimeter attached to coil
  2. Have students circulate to each station or provide 1 per group
    • Make observations and play with each set up
    • Generate questions about the experiment
    • Devise a cause-and-effect relationship in each setup

EXPLAIN

  1. Provide opportunity for students to use PhET simulations
    • Magnets & Electro Magnets
    • Magnet and compass
    • Faraday’s Electromagnetic lab
    • Generator
    • Ask students to make observations as they use the simulations
    • Draw and explain a cause and effect relationship.
  2. Together with students construct cause and effect relationships from their experimentation and observations
    • Magnet’s north and south poles
      1. Opposite poles attract
      2. Earth as a giant magnet
      3. Magnets: How do they work?
    • Magnetic field and field lines
      1. Dissipating magnetic field force with distance
      2. What causes the northern lights?
    • Relationship between electric currents- magnetism and magnetism-electric currents
      1. Electric generation
      2. Motors
      3. world’s first generator
      4. Electromagnetic induction
    • Cosmos: A Spacetime Odyssey S1E10 “Electric Boy”
      1. Have students watch the video to learn about Michael Faraday and his discovery of electromagnetic induction.

ELABORATE:

  1. Students select one of the 3 magnetism activities
    • Magnetic Train (See previous)
    • Curie Effect Magnetic Heat Engine
    • Windmill (Provided below)
      1. Windmills are structures that convert wind energy into rotational energy. The wind blows through the fan blades on the windmill causing them to turn. Traditionally, windmills were used to mill grain and pump water, but today we will use wind energy to power an LED bulb.
      2. Materials needed
        • DC motor, LED, craft sticks, paper cups, hot glue, drill and a bit to match the motor size, fan
      3. Directions:
        • Cut a paper cup into four even parts, removing the round bottom of the cup. These parts will be used as fan blades to catch the wind.
        • Glue two craft sticks together in the center forming an X.
        • Drill a hole through the center of the craft stick X. Be sure the glue has dried first. This will be part of the structure of the windmill and will hold the blades in place.
        • Glue your fan blades in place. Glue the craft sticks to the back of the blades. Set the blades at a 25-35 degree angle to the craft sticks. This will help the blades to turn more efficiently in the wind. This is the most important part of the design; try different materials and angles to create the optimum windmill.
        • Attach the leads of your LED to the terminals on the motor. Do this by wrapping the LED leads through the terminals.
        • Glue the windmill blades onto the motor arm.
        • Put a paper cup upside down on the table and glue two craft sticks to the side of it, facing upward. This will function as a stand for the windmill blades.
        • Glue your motor to the craft-stick stand and let it all dry.
        • Turn on your fan and put the windmill in front so it can catch the wind.
        • Your bulb should light up given you have enough wind power and the leads are wired correctly. If the bulb isn’t lighting up in the wind, reverse the leads of the LED.
  2. Students create their magnetism demo and give it purpose! (they can turn their demo into a game)
  3. Students produce a series of questions and cause/effect explanation of their demo
  4. Teacher evaluates students on their cause and effect explanation of magnetic and magnetic induction principles

Educational Standards

NGSS CONNECTION:

MS-PS2-3. Ask questions about data to determine the factors that affect the strength of electric and magnetic forces

COMMON CORE CONNECTION:

ELA/Literacy
RST.6-8.1
Cite specific textual evidence to support analysis of science and technical texts, attending to the precise details of explanations or descriptions.

Mathematics
MP.2 Reason abstractly and quantitatively.

DOK:
Level 2: Concept
Level 3: Strategic Thinking

Projects